Amish Butter Braid Recipe
Butter braid pastries are a type of pastry made from a rich, buttery dough that is rolled out and braided around a filling of sweetened cream cheese and fruit.
The pastry is known for its flaky texture and buttery flavor, which comes from the high butter content in the dough. It is shaped into a large braid and baked until lightly browned.
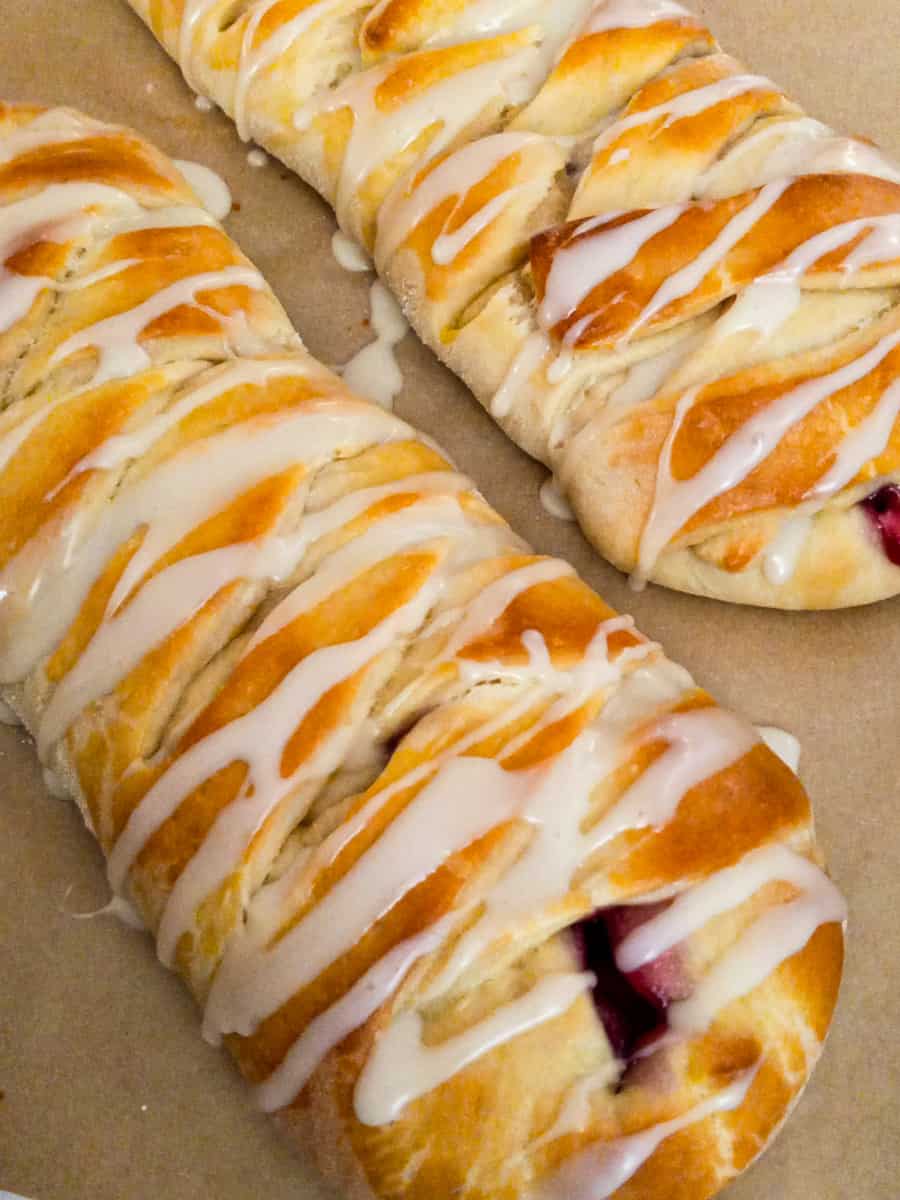
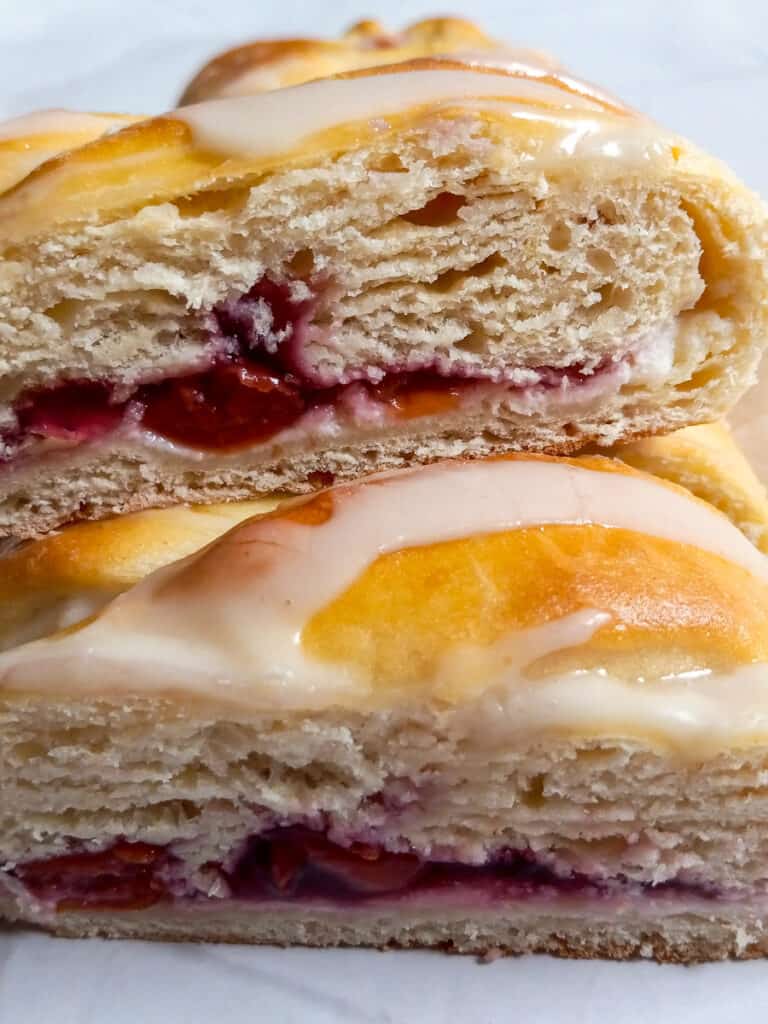
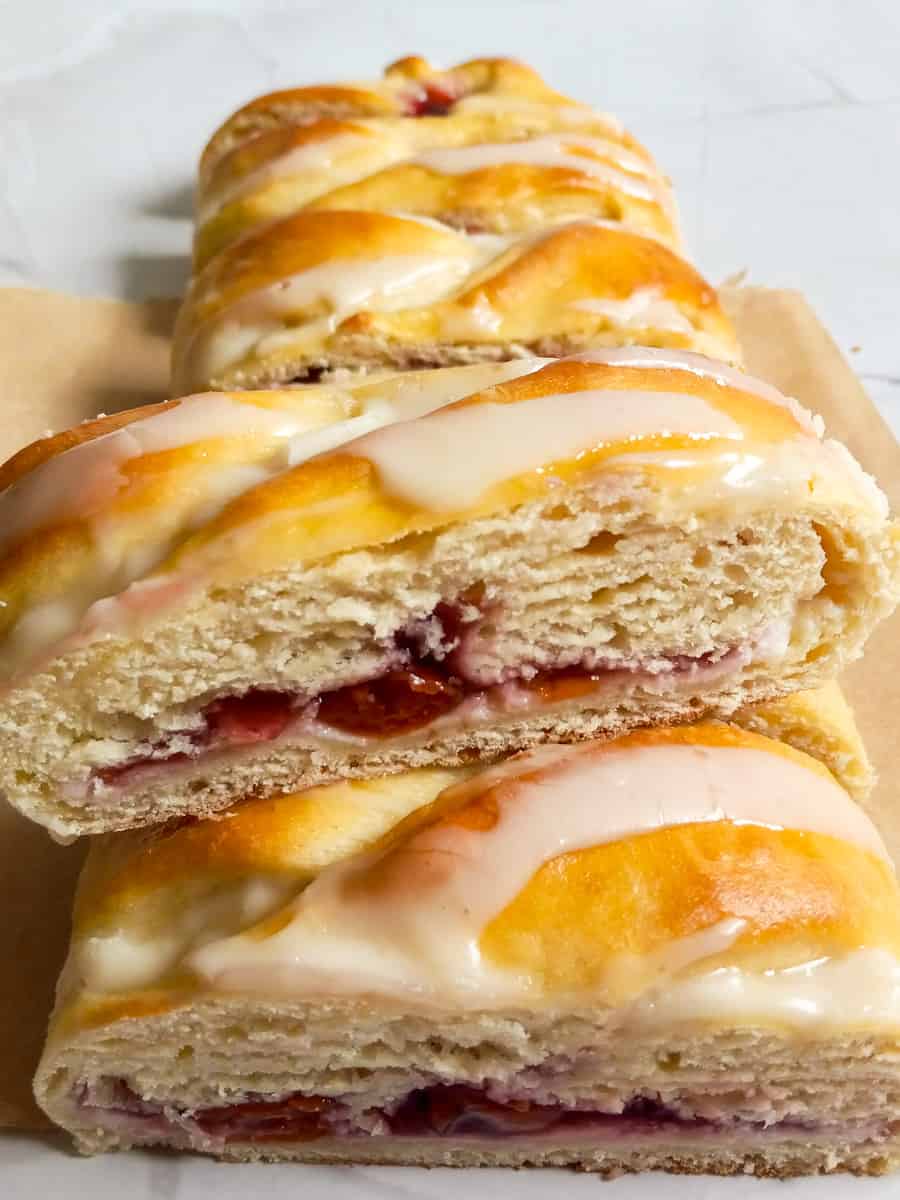
This Amish recipe for fruit-filled butter braid pastries is a variation of the traditional butter braid pastry that is made with a fruit filling, typically cherry, apple, or blueberry.
The Amish are known for their traditional baking methods. And this homemade pastry recipe is a perfect example of their expertise in creating delicious and unique desserts.
These braided dough pastries are typically served as a dessert or breakfast item and are enjoyed by people of all ages.
What Is a Danish Pastry?
A Danish pastry is a type of sweet pastry that originated in Denmark. It is a light, flaky pastry made from a laminated dough that is layered with butter.
The dough is then rolled out and shaped into various forms, such as a rectangular shape or a crescent shape, and typically filled with sweetened cream cheese or fruit jam.
Danish pastries are often topped with a sweet glaze or frosting and can be garnished with nuts or fruit. They are popular in many countries as breakfast pastries or desserts.
Danish pastries are also known for their intricate and beautiful shapes, often achieved through a pastry cutter or twisting and folding techniques.
And trust me, Danish pastries are amazing!
Homemade Danish Pastry Braids
This Amish recipe for braided dough is a copycat of the classic Cheese Danish Braid.
And this type of braided pastry dough goes by different names, including Butter Braids due to its high butter volume (or even Braided Bread). But it may also be referred to as Danish Breakfast Rolls or Danish Pastry Braids, as it closely resembles Danish pastries.


This post contains affiliate links...
Mixing Pastry for Braids
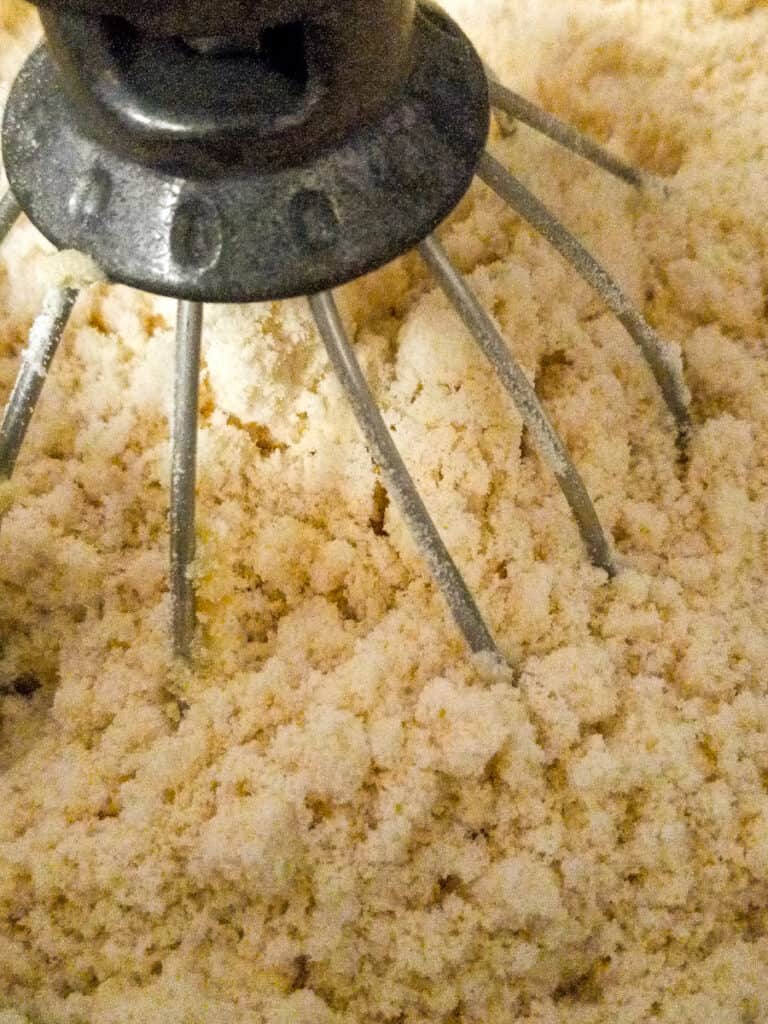
There are different methods that can be used to mix this pastry dough. You will need to cut the cold butter into the flour either by using a mixer, a food processor, or a pastry blender.
I place my flour and salt into my mixing bowl. Then slice cold butter into chunks and add it to the flour. Using my whisk attachment, I blend it together on medium/low speed until the butter is crumbled into small pea-sized pieces.
Meanwhile, I add active yeast to warm water and let it rest for several minutes until it looks foamy.
Then I remove the whisk attachment and replace it with the paddle attachment. Add the dissolved yeast, eggs, and sugar and mix until it all comes together.
Place the dough into a greased bowl, cover it with plastic wrap, and refrigerate.
Overnight Danish Braids
It's lovely to have fresh warm pastry braids for breakfast with a cup of coffee. And with this recipe, you can mix the batter the night before. Cover it tightly and refrigerate overnight.
The next morning, you will need to get the dough out of the refrigerator for at least an hour or two before you want to roll it out. Set it in a warm place to allow the dough to come to almost room temperature so that it's easier to roll out.
Do I Really Need to Chill the Dough for Several Hours?
I was skeptical about whether chilling the dough is really necessary. You know, sometimes I get impatient and don't feel like waiting several hours to finish my dessert. So I tried a batch to see how much difference the chilling process makes.
I mixed the pastry dough and let it rest at room temperature to rise for a little over an hour. Then I rolled out the dough and finished the braids as usual.
The result was beautiful soft braids that were quite delicious.
So, if you are in a rush, and simply cannot wait to let the dough chill for a few hours, you can skip that step.
However, I still recommend allowing the dough to chill for several hours, as the braids made from dough that's been chilled tend to have a flakier texture with more layers.
Trust me, it's worth the wait.
When the pastry dough is chilled, the butter solidifies, making it easier to work with and allowing the layers of dough and butter to remain distinct during the rolling process. This creates the flaky, layered texture that is characteristic of butter braid pastries.
Overall, refrigerating butter braid pastry dough before rolling it out is an important step in the process of creating a beautiful, flaky, and flavorful pastry.

Easy Breakfast Cheese Danish
In case you are feeling intimidated to try this recipe, let me assure you that it's actually quite easy to prepare these beautiful Danish braids. And besides having to wait for the dough to chill, they really don't take long to make.
There are a number of steps involved, but I have outlined them for you to make it easy. And if you follow the steps carefully, you will end up with a beautiful and delicious pastry.
This easy breakfast Danish recipe doesn't involve any layering or folding. Instead, the butter is cut and mixed into the flour mixture. And we still manage to create a beautifully soft and flaky dough.
And it's not hard to create a lovely braided roll.
There are different techniques that could be used to braid the rolls. Some people cut notches into the dough, etc. And you may find a different way from mine that you like better.
But if you check out my photos above, you'll get a picture of what I do.
Butter Braid Instructions
The dough will be sticky, so you may want to grease your hands with butter before handling it.
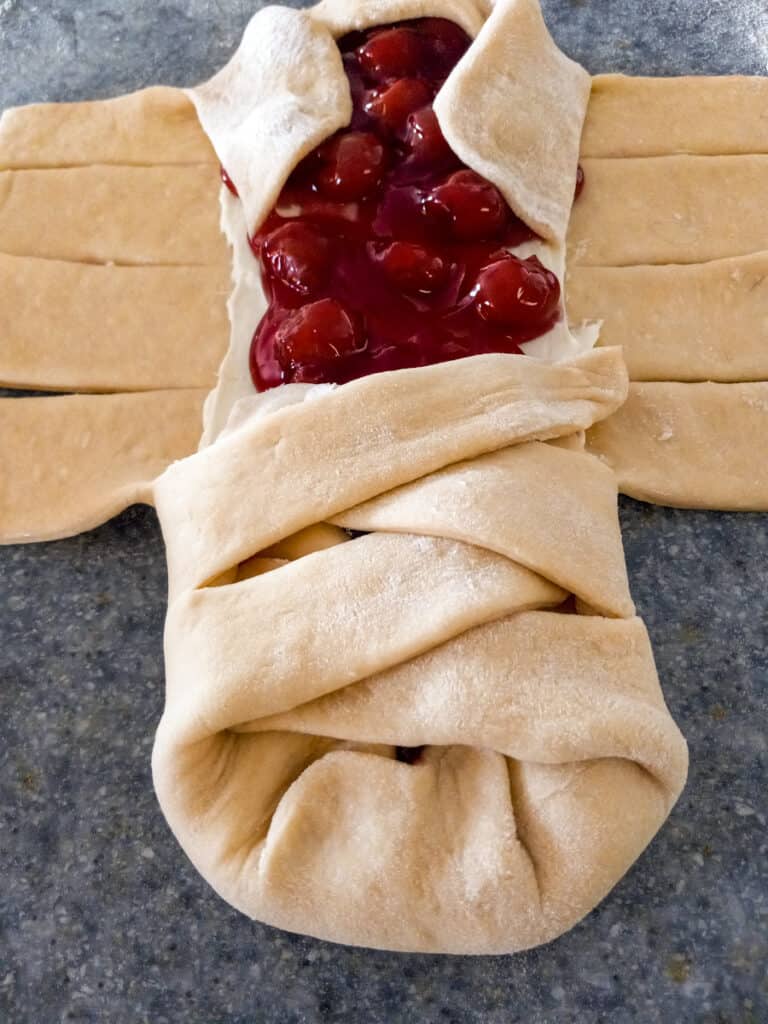
Roll out the pastry on a floured surface. Then spread the filling onto the center of each sheet of dough. Some people like to cut the strips toward the center before putting the filling on. Either way will work, but I like to spread mine first.
Then I use a pizza cutter and make approx. 3" long cuts almost to the filling. The suggestion is to make about 1" wide strips, but feel free to go smaller or wider, it's no big deal.
Fold both ends up over the edge and bring the long strips up over the sides.
Now you are ready to begin braiding by simply crisscrossing the dough from side to side. Start by going almost straight across, then topping it at a slight angle.
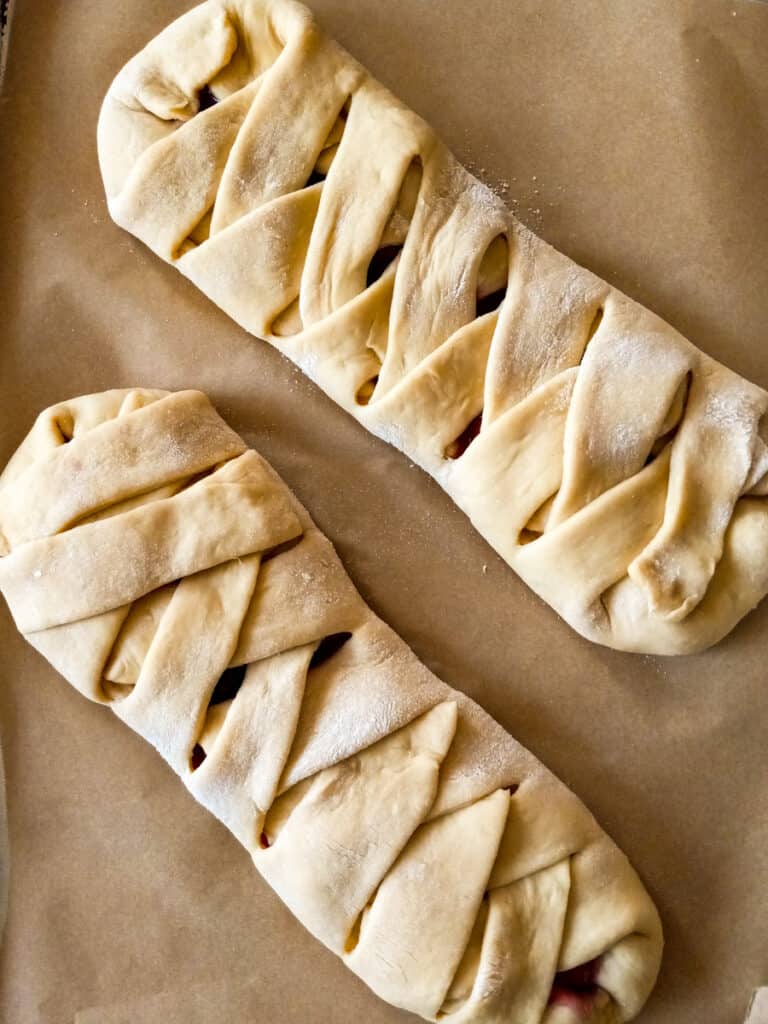
And it's really not a big deal if you get to the end and end up with one strip on top of another one. The pastry dough has an amazing taste and airy texture. And while the filling gives each slice an extra depth of flavor and moisture, the ends are still great even if they have more dough.
Carefully transfer the braids to parchment-lined sheets. (If preferred, you can place the rolled dough onto the baking sheet before spreading it.) If you place them diagonally, two braids will fit on a large sheet pan.
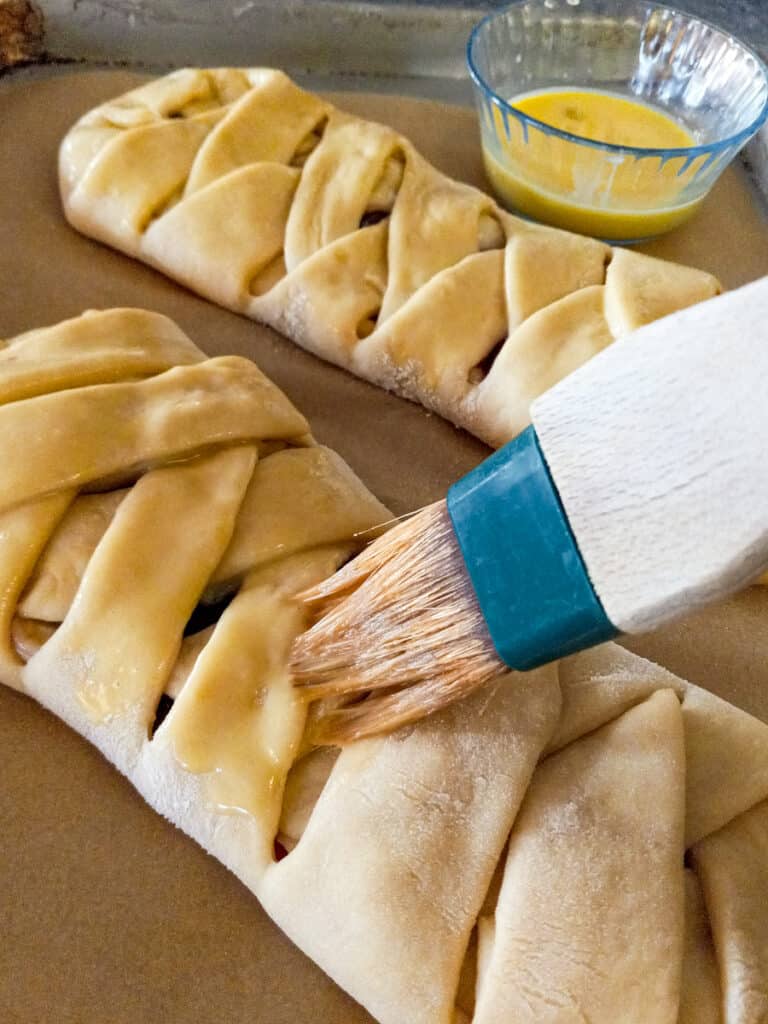
Lightly cover the braids with a tea towel and let them rise for about 30 - 45 minutes. Then brush the tops with a bit of egg wash. Now they are ready to bake.
When they are done, definitely take a moment to enjoy your beautiful creation before indulging in its glory. 🙂

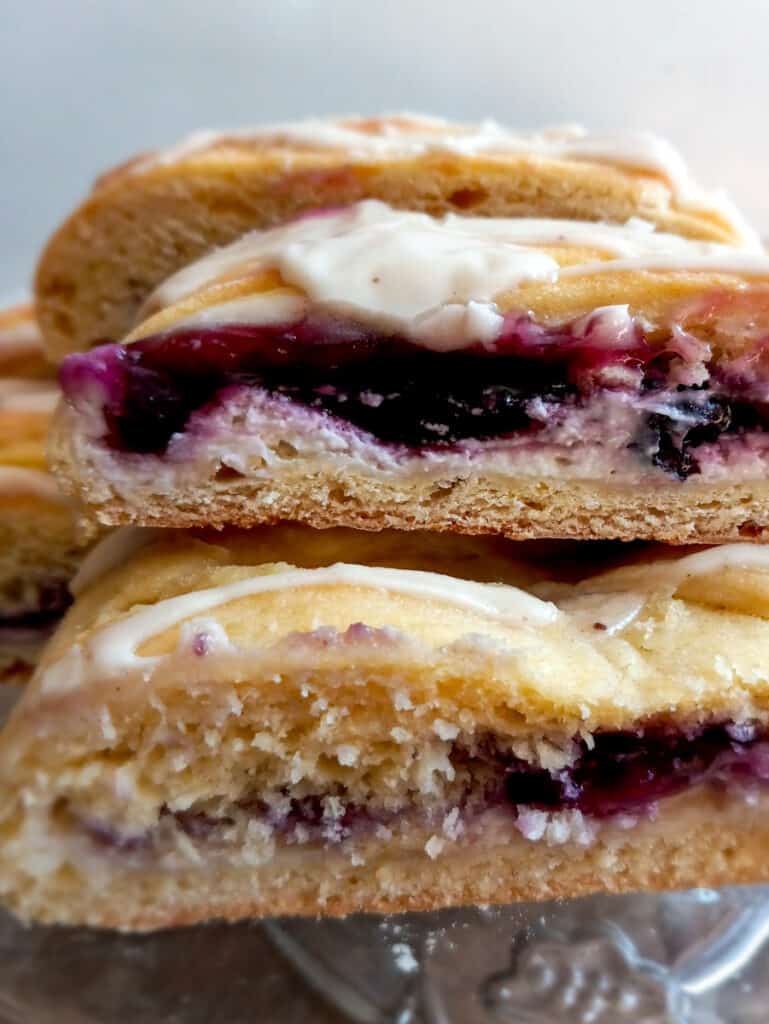
Cream Cheese Blueberry Danish
Butter braids with cream cheese and blueberry pie filling are my very favorite. I love anything with blueberries! And a delicious, freshly baked blueberry cheese Danish is one of the most heavenly desserts ever!
But I will confess that testing all these recipes, that I post on my blog every week, is creating a problem for me. I've got some extra weight that I need to get rid of, and it's so hard when I keep baking all these goodies that I can't keep my hands off of.
Last week I made Cherry Cheese Danish Braids, and now I have Blueberry Danish Braids staring at me. lol
To keep them fresh, I always freeze at least one or two of the four braids this recipe yields. And fortunately, I have five other people in my household who are always happy to help me eat everything I make. So it all disappears pretty quickly.
Cinnamon Butter Braids
You can use any kind of fruit pie filling or even fresh fruit to make these fruit and cheese Danish braids.
But if you're looking for a different flavor profile, you can make these braids taste more like a cinnamon roll. Omit the cream cheese and fruit filling and use butter, brown sugar, cinnamon, and chopped pecans instead.
Mix the four ingredients together (amounts are listed in the notes of the recipe card below), and spread approx. 1/2 c. of the filling onto each braid.
More Amish Desserts for Breakfast Recipes
I hope you try this Amish recipe for Butter Braid Pastries. They are certainly worth your time. And if you try them, I'd love to hear from you in the comments below.
Butter Braid Pastry (Amish Breakfast Pastry Recipe)
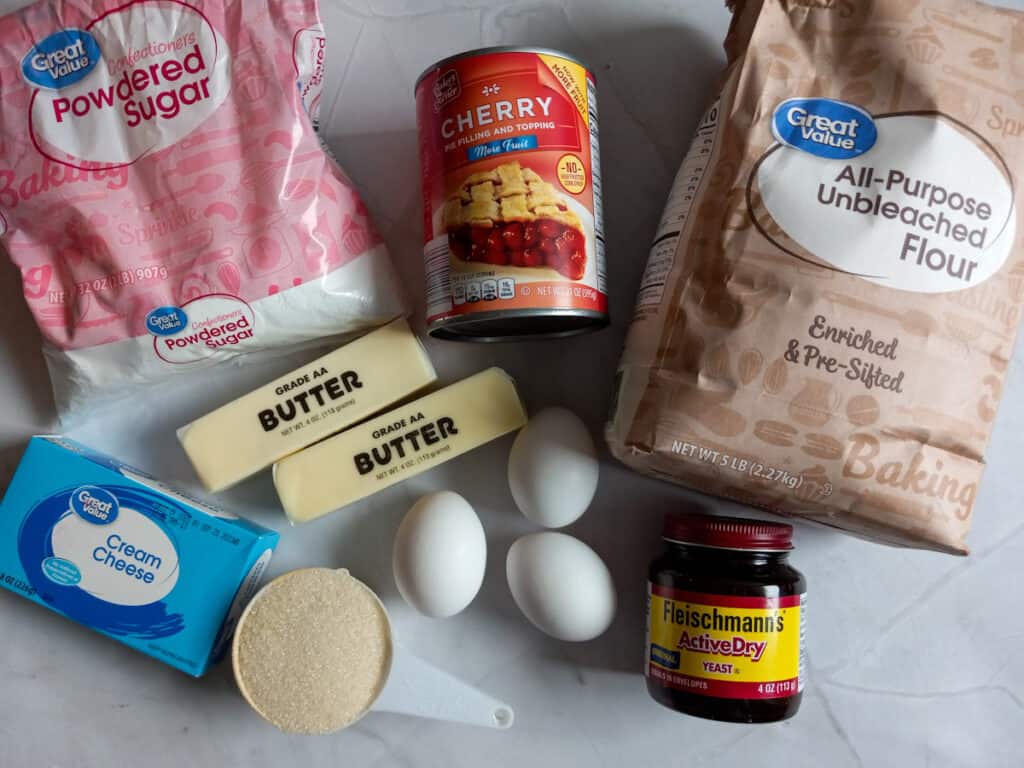
Ingredients
Pastry:
- 1 c. cold butter (2 sticks)
- 5 c. all-purpose flour
- 1 tsp. salt
- 1 pkg. active yeast (scant Tbsp.)
- 1 c. warm water
- 3 large eggs (beaten)
- 1/2 c. sugar
Filling:
- 1 (8 oz.) pkg. cream cheese (softened)
- 1/2 c. powdered sugar
- 1 can pie filling of choice (approx. 2 c.)
Glaze:
- 1 c. powdered sugar
- 1 - 2 Tbsp. milk
- 1 Tbsp. melted butter
- 1 tsp. vanilla
Egg Wash:
- 1 egg, beaten
- splash of milk
Instructions
Pastry:
- Add the flour and salt to a large mixing bowl. Cut the butter into slices and add to the flour. Mix until crumbly with mixer, food processor, or pastry blender.1 c. cold butter (2 sticks), 5 c. all-purpose flour, 1 tsp. salt
- In a separate bowl, mix the warm water and yeast. Set it aside for a few minutes until frothy.1 pkg. active yeast (scant Tbsp.), 1 c. warm water
- Add the yeast mixture, eggs, and sugar to the flour mixture and gently mix until combined. (Mix by hand or with the paddle attachment.) The batter will be sticky.3 large eggs (beaten), 1/2 c. sugar
- Place into a greased bowl. Cover tightly and refrigerate for at least 5 - 6 hours or overnight.
- Remove the dough from the refrigerator and allow it to come back to almost room temperature again.
- The dough will be sticky, and I recommend greasing your hands with butter before handling. Divide the dough into 4 equal parts, and on a floured surface, roll each part into a 12x9" rectangle.
- Divide the cream cheese filling into 4 parts and spread it in a 3" wide strip over the center of each braid. Then spread about a 1/2 c. of fruit filling over the top of the cream cheese.1 (8 oz.) pkg. cream cheese (softened), 1 can pie filling of choice (approx. 2 c.), 1/2 c. powdered sugar
- With kitchen shears or a pizza cutter, cut the sides toward the center in strips approximately 3" long and 1" wide. Then fold both ends up over the filling tucking the strips along the sides. Continue to fold the strips over the filling, alternating from side to side creating a crisscross pattern.
- Carefully place them onto greased or parchment-lined cookie sheets, leaving at least an inch of space between the rolls. (If preferred, you can lay the sheets of dough onto parchment paper before spreading the filling and cutting strips to easily transport them onto the baking trays.)
- Cover lightly with a dish towel and set aside to rise for about 30 -40 minutes.
- Preheat the oven to 350°.
- Just before baking, brush the tops with egg wash to give them a lovely browned finish. Bake for 20 - 25 minutes or until lightly browned.1 egg, beaten, splash of milk
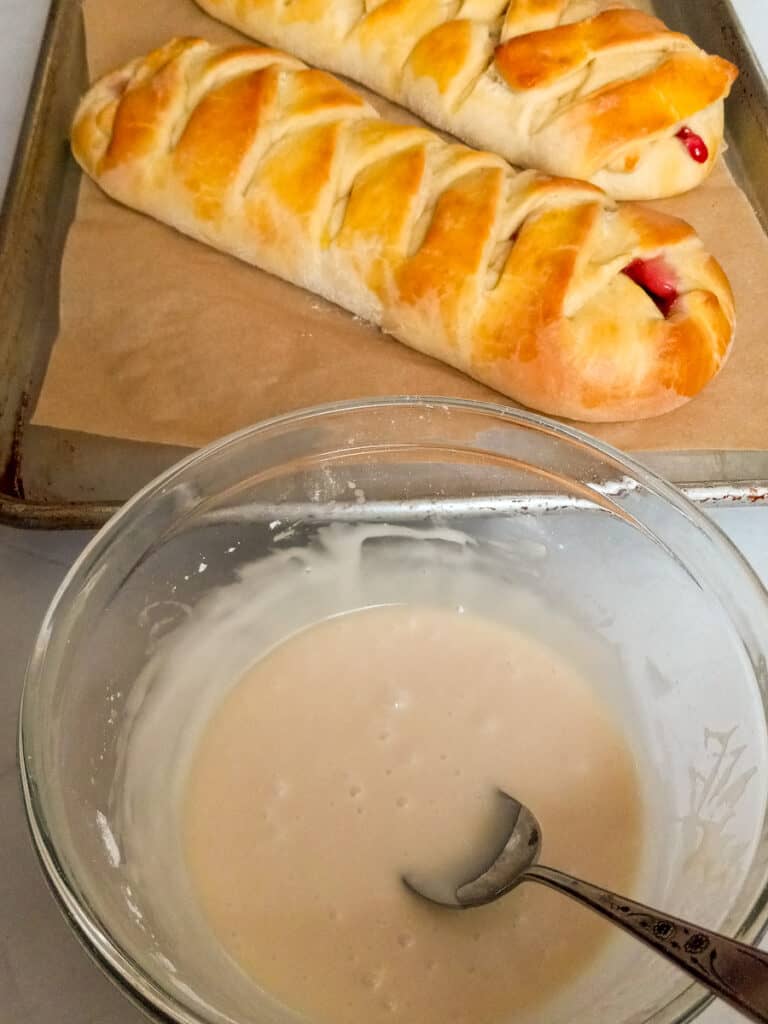
- Cool slightly. Then drizzle the glaze over the top.
Filling:
- Beat cream cheese until smooth, add powdered sugar, and mix until creamy.
Glaze:
- Mix ingredients until smooth. Add more or less milk to get the consistency you want. (Wait to mix this until you're ready to drizzle it since it will thicken as it sits.)1 c. powdered sugar, 1 - 2 Tbsp. milk, 1 Tbsp. melted butter, 1 tsp. vanilla


Mommoo
Just made this. It wasn't a difficult recipe to follow and the results turned out great.
Anna
So glad it turned out for you!
Courtney Meacham
Hey there! I’m going to be trying your recipe soon. It says I can freeze them. Should I prepare the danish and freeze before baking or do I need to freeze them after they are baked?
Anna
I'm sure it would work to freeze them before baking. However, I have never done that, so I can't say for sure how to do it. I would probably thaw them in the fridge overnight. I usually freeze some of it after being baked if we don't eat it too quickly. lol
Courtney Meacham
Thank you so much! I’ll definitely be trying soon!
Anna
You're welcome! Hope it turns out amazing!