Homemade Caramels Recipe
This recipe for Amish caramels is a beloved sweet treat with a rich, buttery flavor and a soft, chewy texture. Made using basic ingredients like butter, sugar, and sweetened condensed milk (or cream), it's a simple yet delightful confection.
Handcrafted in small batches, these caramels capture the essence of traditional Amish cooking. Perfect for satisfying your sweet tooth! However, allow me to warn you, they are seriously addicting!
Follow today's recipe to make your own Amish caramel candy and savor the authentic homemade sweetness of this classic treat. They're easy to whip up and offer a taste of simple, timeless goodness with their rich, buttery flavor.
Soft Homemade Caramels
Are you ready to embark on a sweet journey of homemade caramel candy making? There's nothing quite like the luscious, chewy goodness of soft homemade caramels.
Whether you're a first-time candy maker or a seasoned pro, this blog post is your guide to creating the best homemade caramel candy. We'll talk about the essential steps, including the use of a candy thermometer.
With this easy caramel recipe, you'll be able to master the art of cooking these delightful treats that are perfect for any time of year, especially during the holiday season.
This post contains affiliate links...
Tips for Creamy Soft Amish Caramels
- Medium Heat: Achieving the perfect caramel requires a little patience with cooking it over medium heat. Since it needs to be stirred constantly, you may be tempted to turn up the burner to speed up the process. It takes a little time to get it up to softball temperature, but be patient, it will be worth it. 🙂 (I stir mine with my Pampered Chef spatula, and it takes approximately 25 minutes.)
- Temperature Control: Invest in a candy thermometer, your trusted companion for ensuring that you reach the softball stage, that perfect temperature for making creamy, chewy caramels. Using a candy thermometer helps to make the job easy and ensures perfectly cooked caramel. For an accurate reading of the right temperature, don't let the tip of the thermometer touch the bottom of the pan, and watch for it to reach the softball stage.
If your thermometer isn't accurate, you may run into problems.
I made this recipe for caramels two times in the past week and it kept getting too hard. Using my candy thermometer, I brought it to the softball stage, but it turned out hard. Of course, the caramels are still delicious and are getting devoured by my kids. But it was supposed to be soft caramels, not hard ones.
So, I was trying to figure out what the problem was and finally decided to buy a new thermometer. Turns out my thermometer was not accurate. So, now that I got a new instant-read one, we're finally able to enjoy some soft and chewy caramels.
Making Caramels Without a Thermometer
I still recommend investing in a candy thermometer. However, you can make caramel candy without one. My mom always used the cold water test method.
When using a cup of cold water to test caramel when making candy, you can determine whether it's in the soft ball or hard ball stage by observing how the caramel behaves in cold water. Here's how you can differentiate between the two stages:
- Soft Ball Stage:
- To test for the soft ball stage, take a small amount of the boiling caramel mixture and carefully drop it into a cup of cold water.
- Allow the caramel to sit undisturbed in the cold water for a few seconds.
- When you remove the caramel from the cold water, it should have formed a soft, pliable ball that can be easily squished between your fingers. It should hold its shape, but it's shapeable and not hard.
- Hard Ball Stage:
- To test for the hard ball stage, take another small amount of the boiling caramel mixture and drop it into a fresh cup of cold water.
- Let it sit in the cold water for a brief moment.
- When you take the caramel out of the water, it should form a hard, solid ball that doesn't flatten or change shape when pressed between your fingers. It will be more rigid than the soft ball.
These two stages are important for making different types of candies. The soft ball stage is often used for making fudges and soft caramels, while the hard ball stage is suitable for firmer caramels, nougat, and some types of hard candies. Using the cold water test is a practical method to achieve the desired texture in your candy recipes.

How to Make Soft Caramel Candies
You might have thought that making Amish caramels would be tricky or difficult. But it is actually quite simple. It is made with only a few ingredients and requires minimal work, but the results are incredible!
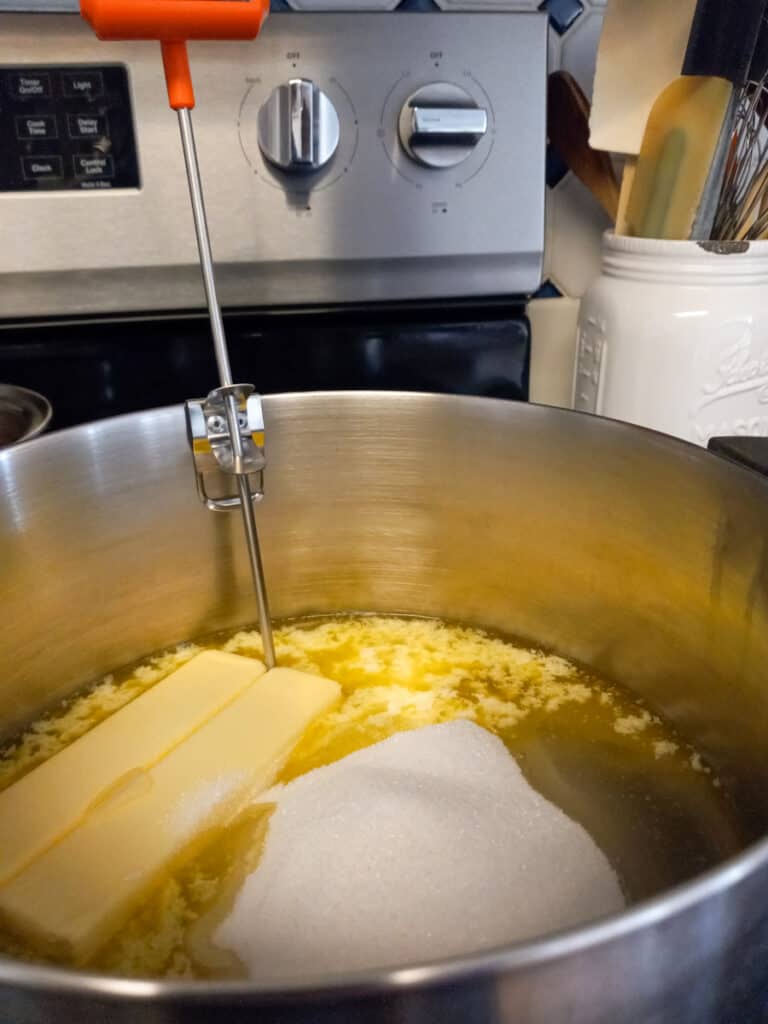
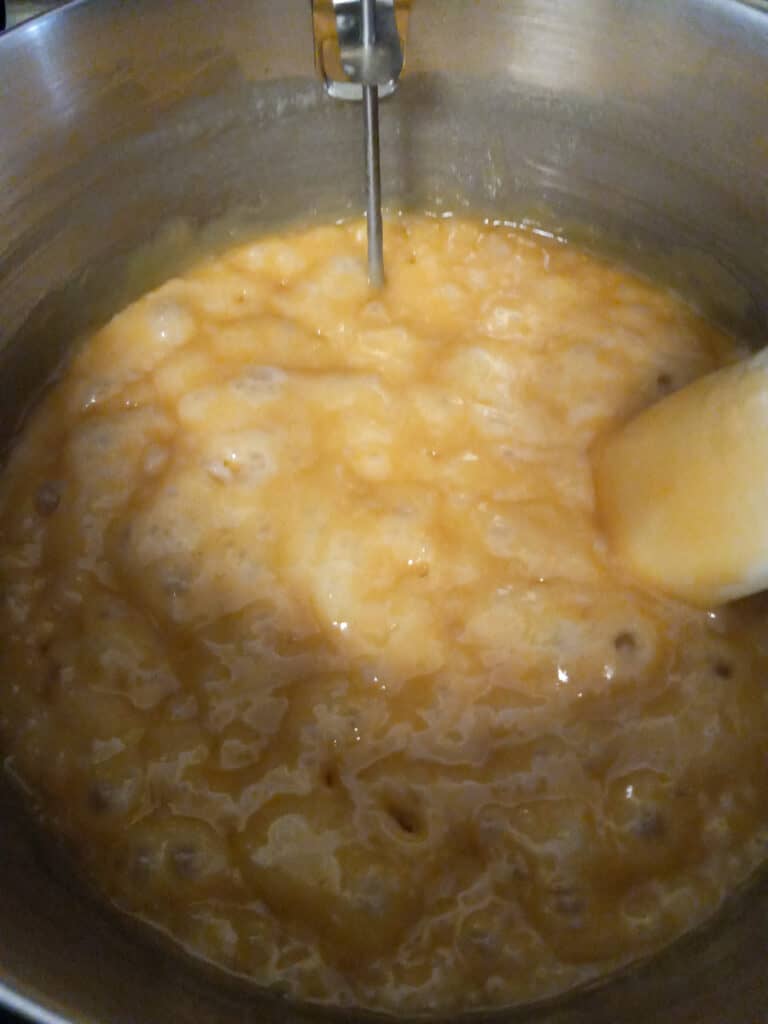
We begin by adding the butter, white sugar, and light corn syrup to a large heavy-bottom saucepan (use at least a 3-quart-sized pan because the caramel will rise while cooking). Bring it to a boil over medium heat.
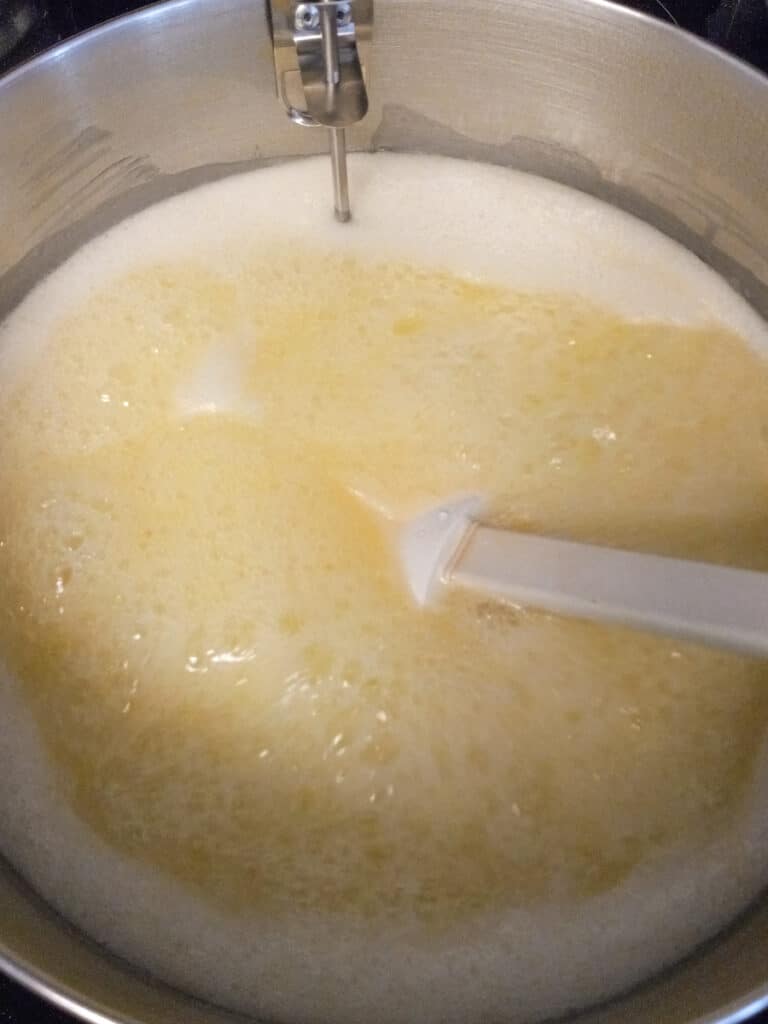
While stirring or whisking, slowly add the condensed milk or heavy cream. Cook over medium heat, stirring constantly, until the candy thermometer reads approximately 238 degrees F. (softball stage).
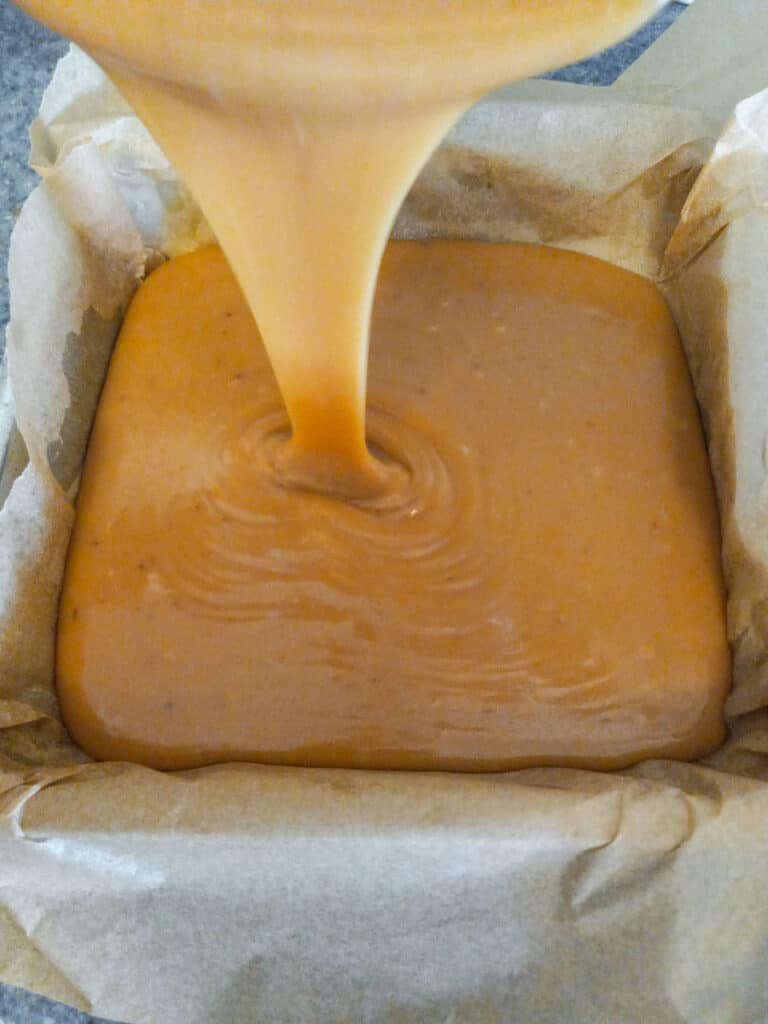
Remove the mixture from the heat and stir in the vanilla extract. Immediately pour the mixture into an 8 or 9-inch square pan that has been lined with parchment paper (or a heavily buttered pan).
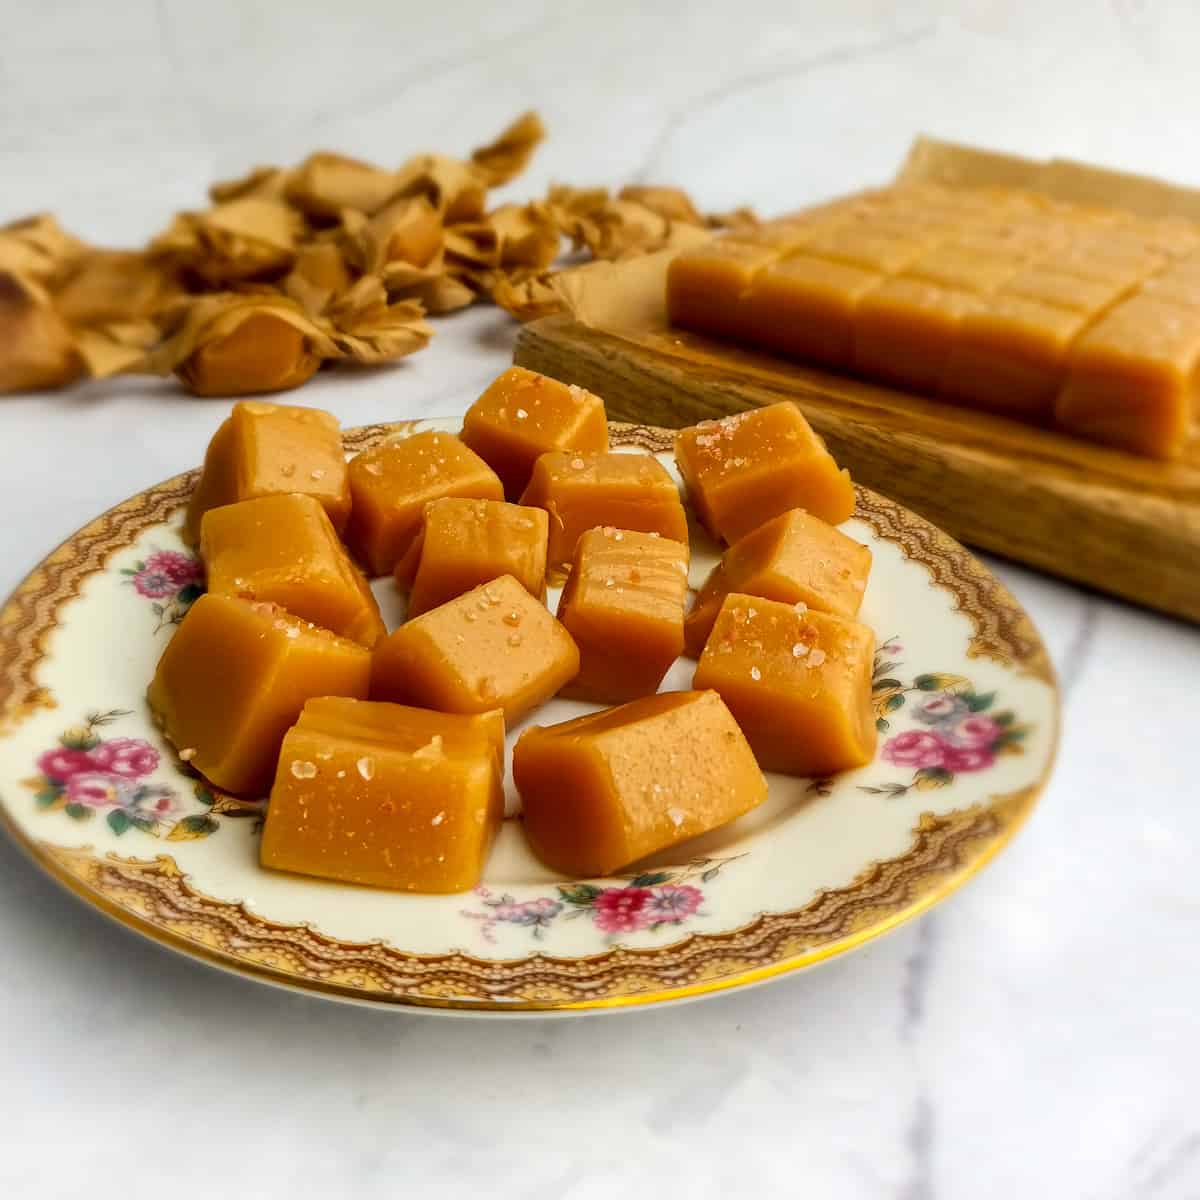
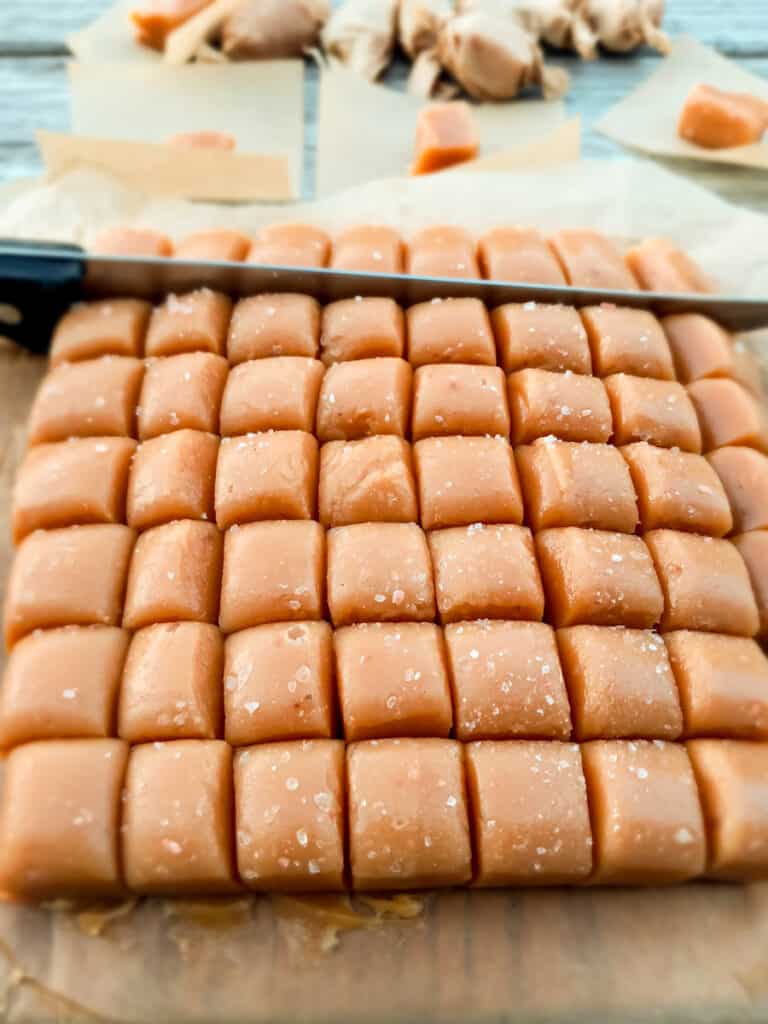
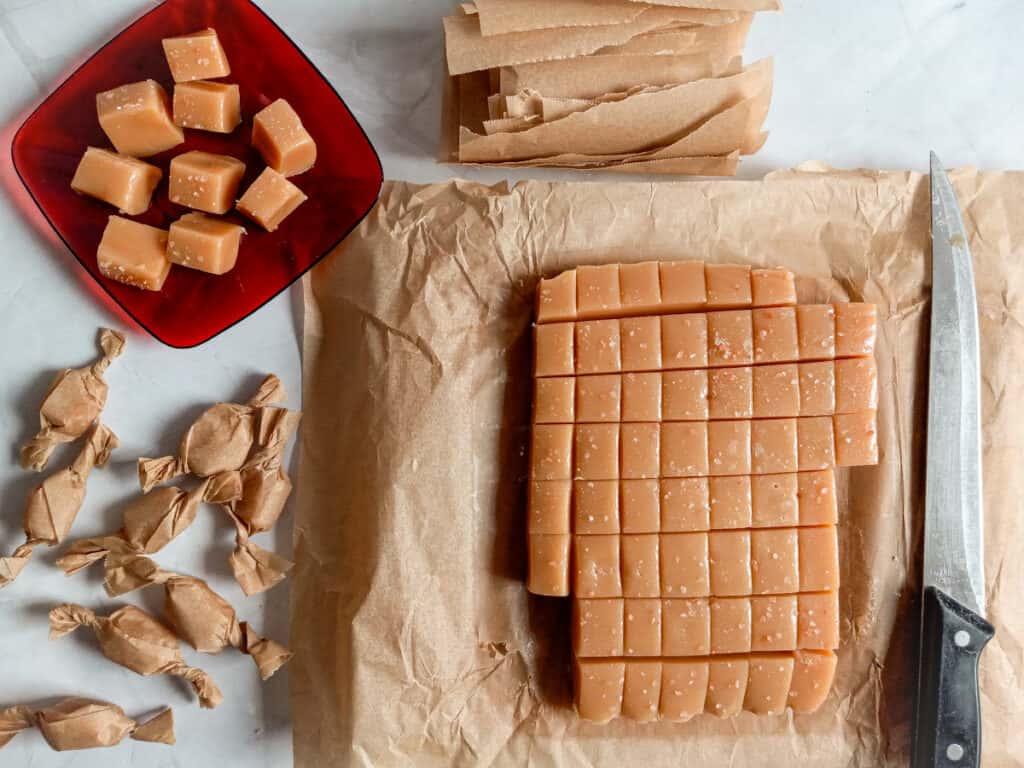
Then set it aside to cool for several hours until the caramel has set. To make it easier to cut the caramels, you can go ahead and refrigerate it for an hour or so before cutting with a long, sharp knife.
Creamy Caramels, Chewy Caramels, or Hard Caramels
Using this same easy soft caramel recipe, you can create any consistency of caramels desired. For soft and creamy caramels boil the mixture to 235 degrees F.
For chewier caramels, boil it longer.
If you prefer hard caramels to suck on, simply cook the mixture until it reaches the hard ball stage which is approximately 260 to 265 degrees F.
Homemade Caramels with Sweetened Condensed Milk or Homemade Caramels with Heavy Cream
This recipe for soft caramels can easily be made using a can of Eagle Brand sweetened condensed milk, or you can use heavy whipping cream instead.
I've made this recipe using condensed milk, and I've also made it with heavy cream. Honestly can't tell much difference between the two. So feel free to use whichever you prefer.
Salted Caramel Candy
When it comes to ice cream toppings, lattes, etc., I am not usually a huge fan of caramel flavorings. Caramel is really sweet, and I usually opt for chocolate instead.
However, salted caramel is another story. When salt is added to the caramel it helps to counteract some of the sweetness. I really enjoy salted caramel goodies.
All of that is to say that adding a bit of salt to your creamy caramels adds a lovely bit of flavor. Pour the caramel mixture into the pan and let it cool for about 30 minutes before adding the salt. After it has partially set, sprinkle the top with coarsely ground salt or salt flakes. Or you can opt for adding a half teaspoon of salt to the caramel, along with the vanilla, after it is finished cooking.
How to Store Homemade Amish Caramels
To keep your homemade Amish caramel candy fresh and prevent it from becoming too hard or sticky, follow these simple steps:
- Cool Thoroughly: After making your caramels, allow them to cool completely. At room temperature, this may take several hours. To speed up the cooling process and make them easier to handle, refrigerate the caramel for at least an hour.
- Cut and Wrap: Use a sharp knife and a cutting board to slice the caramels into individual pieces. Wrapping homemade caramels individually is essential to prevent them from sticking together.
- Airtight Storage: Put the wrapped caramels in an airtight container, like a tin, plastic box, or a glass jar with a well-sealing lid. This keeps them fresh and protects them from air and moisture.
- Room Temperature: Store the airtight container at room temperature in a cool, dry place. Avoid direct sunlight and heat, which can cause melting or softening.
- Enjoy Within A Month: Homemade caramels are at their best within the first few weeks. While you can store them longer, their texture and flavor may change over time.
- Refrigeration or Freezing (If Needed): For extended storage, consider refrigerating caramels in an airtight container or freezing them. When freezing, ensure they are well sealed to prevent freezer burn. Allow them to thaw at room temperature before enjoying them.
With these steps, you can keep your homemade caramels in excellent condition, ensuring they stay delicious for an extended period.
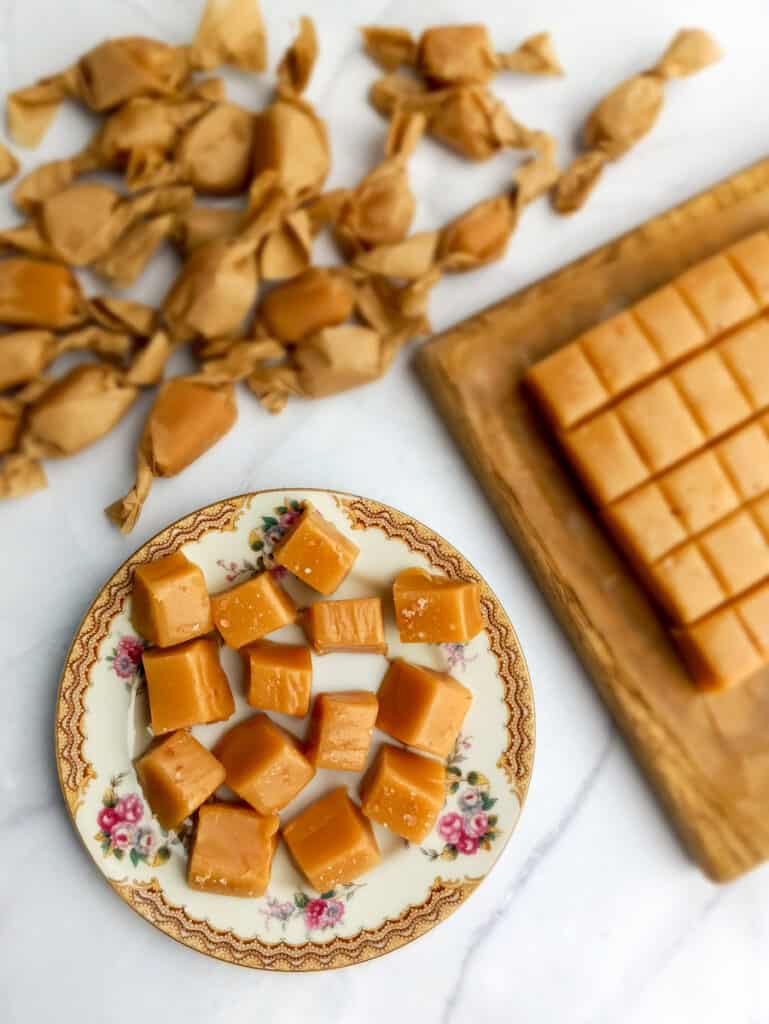
Wrapping Homemade Caramels
Creamy Amish caramels need to be individually wrapped to prevent them from sticking together. Wrap them in parchment paper, wax paper, or candy wrappers.
I typically cut my 9" pan of caramels into about 81 pieces (9x9), then I cut parchment paper into approximately 4 to 5-inch squares to wrap the caramels in. Place a caramel on a piece of parchment, wrap it around the caramel, and twist the ends. Store the wrapped caramels in a bag or airtight container.
More Amish Homemade Candy Recipes
It is so much fun making homemade candies over the holidays. It's a tradition that was part of my life growing up in an Amish home, and I still make homemade candy every year over the Christmas holidays.
I have several that are on my list to make every year. Two of my favorites are Peanut Butter Rice Krispie Chocolate Balls and Homemade Copycat Lindt Chocolate Truffles. And, of course, the best chewy homemade caramel candies!
Creating homemade Amish caramel candy is a delightful and rewarding experience. With this simple homemade soft caramel recipe, you can satisfy your candy cravings whenever you like, or share them as holiday gifts. Happy candy-making!
Visit my shop to purchase my cookbook
Homemade Amish Caramels Recipe
Ingredients
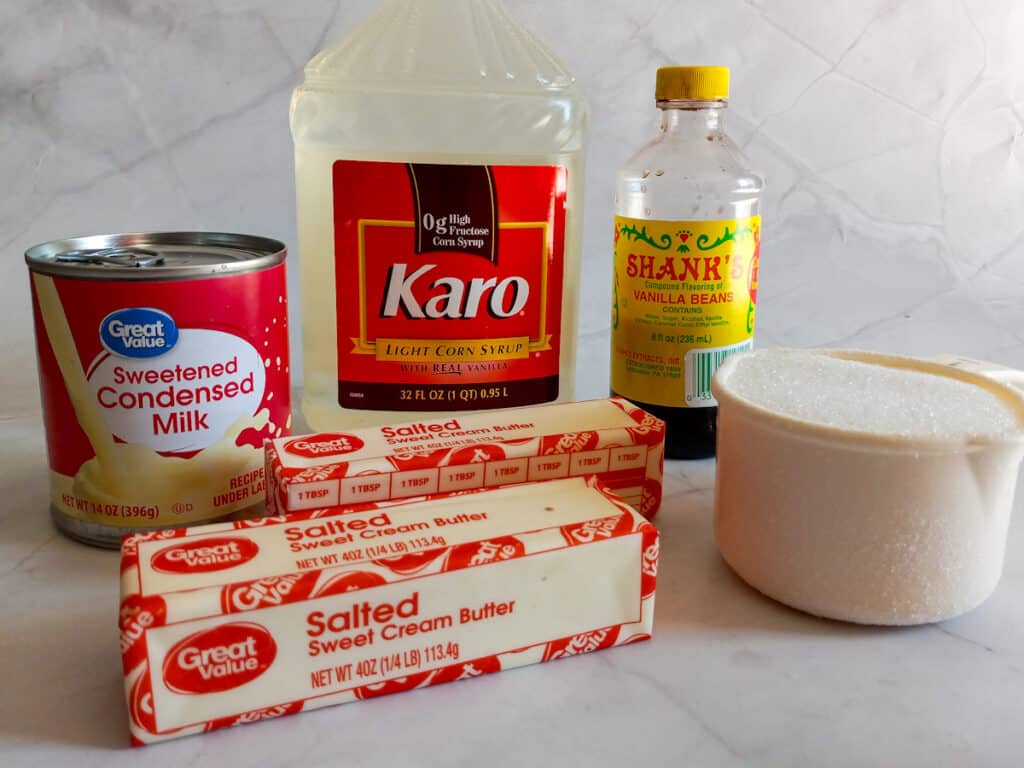
- 1 cup butter (2 sticks)
- 1 cup sugar
- 1 cup light corn syrup (Karo)
- 1 (14 ounce) can sweetened condensed milk (or 1 3/4 cup heavy cream)
- 1 tsp. vanilla extract
- coarse salt or salt flakes (optional)
Instructions
- Line a 9" square pan with parchment paper, and for the easiest removal, you can also spread a bit of butter on top of the parchment. Set aside.
- Add the butter, sugar, and corn syrup to a large heavy-bottom (at least 3 qt. size) pot. Bring it to a rolling boil over medium heat.1 cup butter (2 sticks), 1 cup sugar, 1 cup light corn syrup (Karo)
- While stirring or whisking, slowly add the sweetened condensed milk to the boiling mixture.1 (14 ounce) can sweetened condensed milk (or 1 3/4 cup heavy cream)
- Continue boiling over medium heat, stirring constantly, until it reaches soft ball stage (235 - 240℉). Use a candy thermometer to achieve the most accurate cooking time.
- Remove from the heat, add the vanilla, stir to combine, and immediately pour the caramel into your parchment-lined pan.1 tsp. vanilla extract
- Let it cool for about 30 minutes, then sprinkle the top with coarse salt.coarse salt or salt flakes (optional)
- Cool completely. Refrigerating the caramel for at least an hour before cutting, helps to make it easier to work with.
- With a long sharp knife, cut the caramel into little candy pieces and wrap them individually in parchment paper or candy papers. Store the wrapped candies in an airtight bag or container.


Terry Langley
I have a candy recipe that calls for melting wrapped caramels, adding nuts, dropping by the spoonful and then letting reharden before dipping in chocolate. Has anyone tried doing something like this to this recipe while it is still warm?
Anna
I haven't tried making anything with these caramels, but I thought about it. I see no reason why it wouldn't work.
Jeanne Gray
Oops! Recipe formatting glitch: When increasing the recipe to 2x or 3x the text part of ingredient amounts does not properly adjust, e.g. “1 cup butter (2 cubes)” adjusted to 2x says “2 cups butter (2 cubes)” and 3x says “3 cups butter (2 cubes). Same for the other ingredients.
Anna
I'm sorry about that. The 2x 3x feature is a built in feature in the recipe card. I have no way of formatting the text part to make it change along with the 2x. Whenever you double or triple the recipe, you'll just need to go by the ingredients to adjust. Sorry!