Best Amish White Bread Recipe
This Amish white bread recipe makes a slightly sweet, soft, and tender loaf. It is easy to make, with simple ingredients and detailed instructions so that even a beginner can make an amazing loaf of bread.
Fresh homemade bread tastes so much better than any bread you buy at the grocery store. Let me just say that there is nothing quite like a warm slice of fresh bread with butter melted into it. Drizzle it with honey, and it is simply divine.
If you've never had the privilege of tasting homemade Amish bread fresh out of the oven, you are missing out. Because it is heavenly!
And there is no comparison between fresh homemade Amish white bread and store-bought commercial bread. So if you've never had any, do yourself a favor and make some. It's not hard at all!
Easy Homemade Bread
Making bread may seem intimidating to a beginner. But trust me, it's not that difficult to master. It may take a few tries to get it perfect, but it will be so worth it.
This Amish white bread recipe is great for making with your KitchenAid mixer. It yields two loaves. So the dough will easily fit into your mixing bowl.
Using this recipe is a fail-proof way to create a tender loaf of bread that's perfect for sandwiches, French toast, or enjoying on its own.
Old-Fashioned Bread Recipe
Homemade white bread is a staple in many Amish homes.
My Amish mom baked bread every week. Sliced homemade bread, along with butter and jam or apple butter, was on the table for practically every meal. We never bought bread.
And once you get a taste of this amazingly soft Amish bread, you'll understand why and probably won't want to go back to commercial bread either.
I have more delicious Amish bread recipes on my blog such as honey wheat bread, or honey oat bread, but this recipe for white bread is one we mostly used at home, and it is still my favorite.
I had to cut the recipe down to be able to mix it in my KitchenAid because originally it made five loaves. But my mixer is not big enough to handle that much.
You may also want to try my One-Hour Yeast Rolls recipe, for a quick homemade treat.
How to Make Amish White Bread with a KitchenAid Mixer
You don't need a KitchenAid mixer to make this Amish white bread; most Amish women make it by hand. However, a mixer can help with the heavy lifting and simplify the process. Using the dough hook attachment for kneading, you'll find the task easier.
To make this bread, follow these simple steps:
- Begin by adding 1 tablespoon of flour, 1 tablespoon of sugar, and 2 tablespoons of active dry yeast to your KitchenAid mixing bowl or any large bowl. Combine these ingredients and add 2 cups of warm water. Please make sure the water is at a lukewarm temperature, not too cold or too hot, as it affects the yeast's performance.
- Stir the yeast mixture and let it rest for about 5 - 10 minutes, it should become foamy and bubbly during this time. (If it does not seem active, you may need to purchase new yeast.)
- Add sugar, oil, salt, mashed potatoes, and 4 1/2 cups of bread flour to the mixture. Use the dough hook attachment to blend these ingredients thoroughly.
- While the mixer is running at a low speed, gradually add more flour until the dough begins to pull away from the sides of the bowl. Increase the speed to 2 and knead for a couple of minutes.
- Sometimes the dough will pull away from the sides, but as you continue to knead you will need to keep adding flour. But after it has been kneading for a couple of minutes, just add enough flour till the sides of the bowl are clean. It's ok if it's still sticking a little at the bottom of the bowl.
- As the mixer continues running, pour a small amount of oil into the side of the bowl to grease it, or alternatively, transfer the dough to another well-oiled bowl.
- Loosely cover the dough with plastic wrap or a dish towel. Allow it to rest at room temperature for approximately an hour. During this period, the dough should puff and rise to almost doubled.
Kneading Bread Dough by Hand
A KitchenAid mixer helps to make the job of making bread easy, but it also is not hard to make it by hand.
Follow the same instructions for mixing with a large mixer, except you will mix the dough with a large spoon.
After mixing in the four and a half cups of flour, place the dough onto a lightly floured surface (or you can mix it in the bowl). Knead with your hands as you keep adding flour.
I am adding a link here to show you how this is done. I also created a video that is included in the recipe card to show you how easy it is to make bread.
Forming Bread Loaves
Grease two bread pans with non-stick cooking spray, and grease your hands with a bit of soft butter.
Punch down the yeast dough and knead it for a minute to release the air bubbles. Then divide the dough in half.
Take one portion and form a round disk, trying to get it nice and smooth on the top. Fold in the ends and form it into a loaf.
Poke the bread several times with a fork to remove any air bubbles. Place it into a greased pan and repeat with the second half.
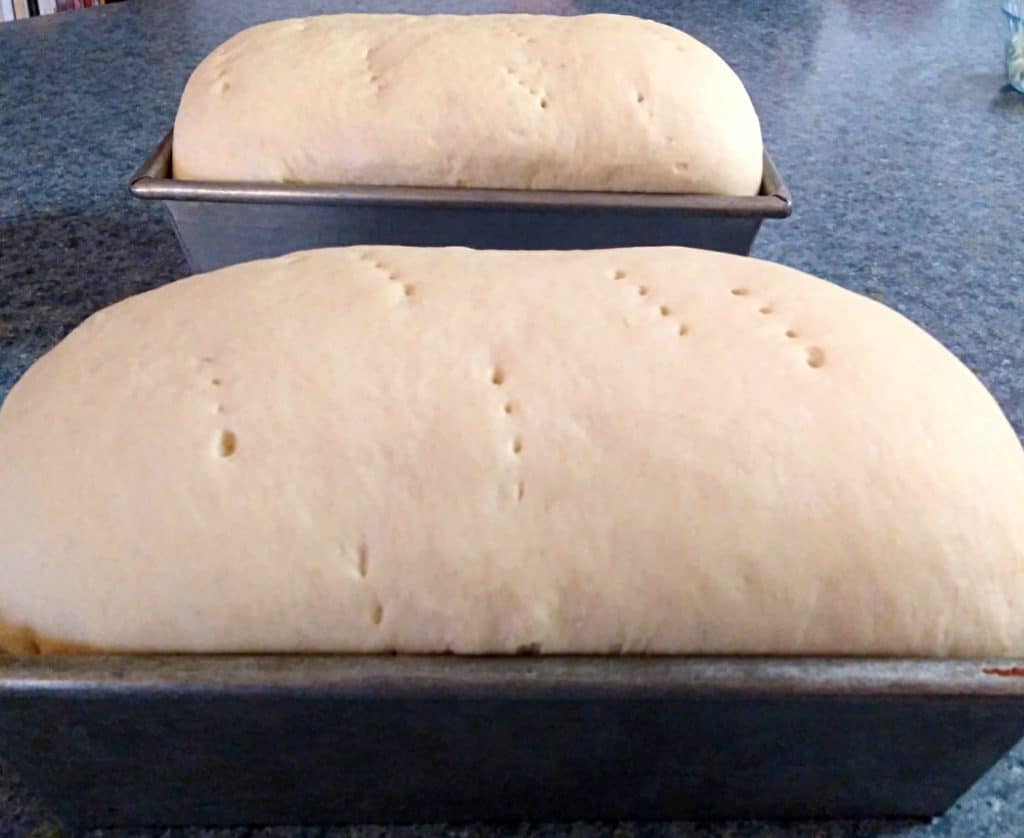
Loosely cover the loaves and set them in a warm place to rise again. You want to let them rise till the center of the loaves is about a half inch to an inch above the top of the pan. It takes approximately 30 - 40 minutes.
Baking Bread
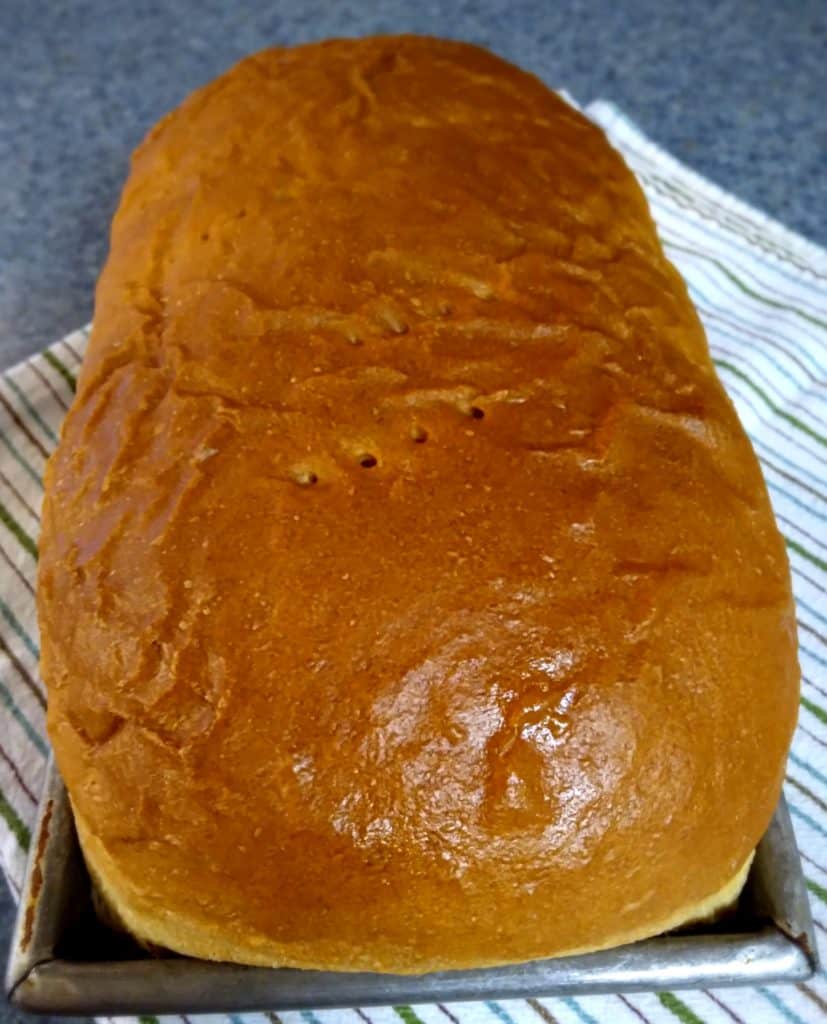
Make sure to preheat the oven before the loaves are ready to bake. Bake the bread for 30 - 35 minutes at 350 degrees F. or until the tops are golden brown.
(One way to tell if bread is done - at least if the pans were properly greased - is by using potholders, grabbing both sides of the bread pan, and giving it a quick upward jerk to see if the bread is loose from the bottom. If it pops up, it should be finished.)
Remove it from the oven and let the bread rest in the pans for about 10 minutes. Brush the tops with butter.
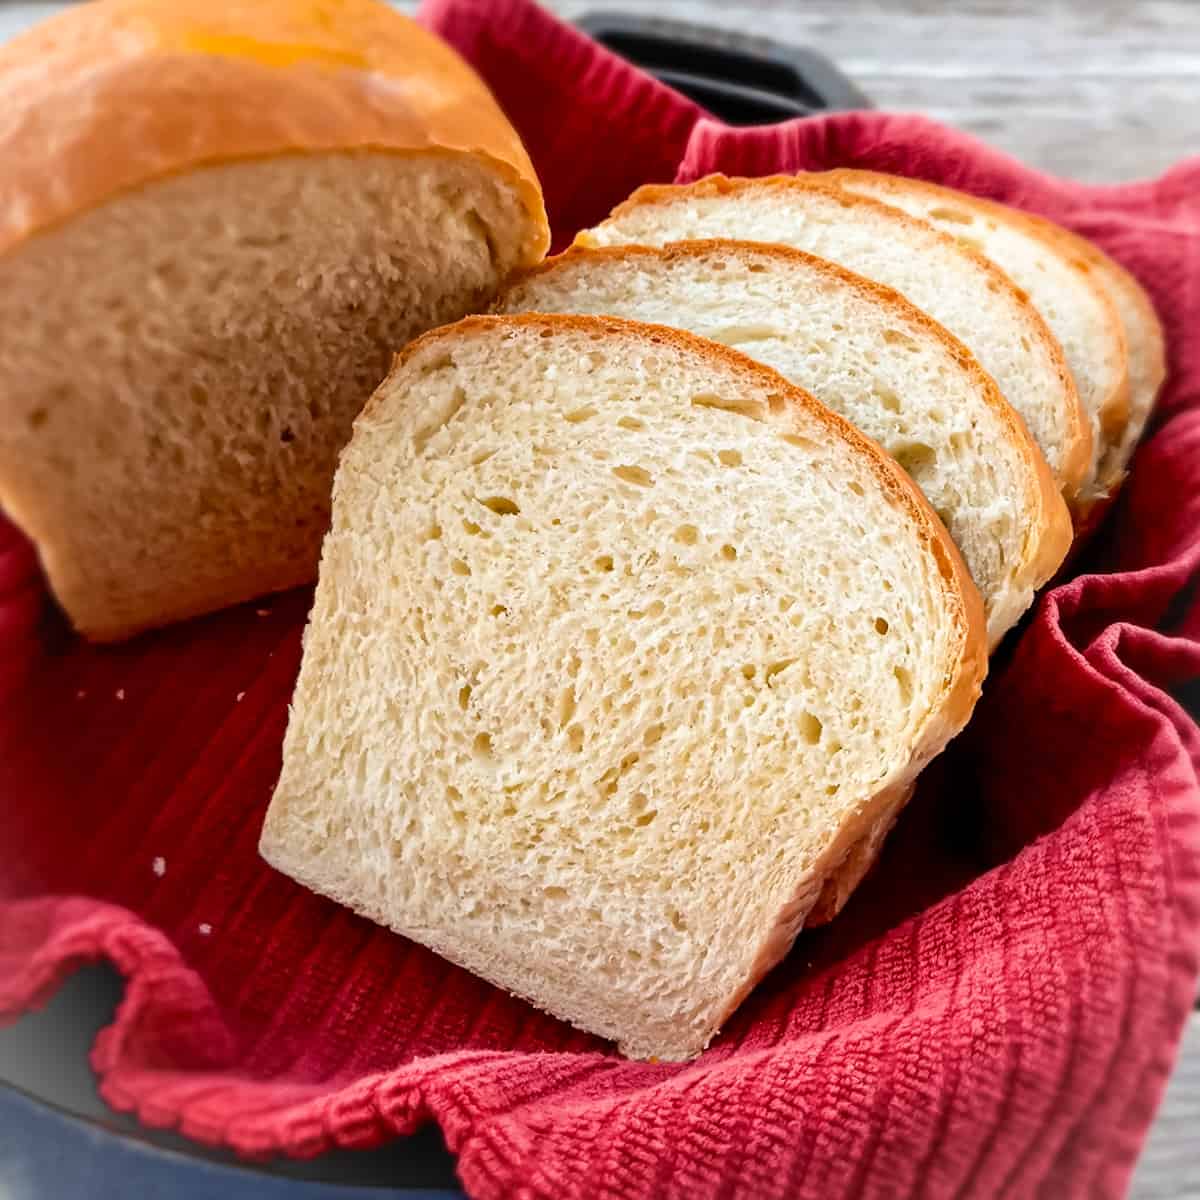
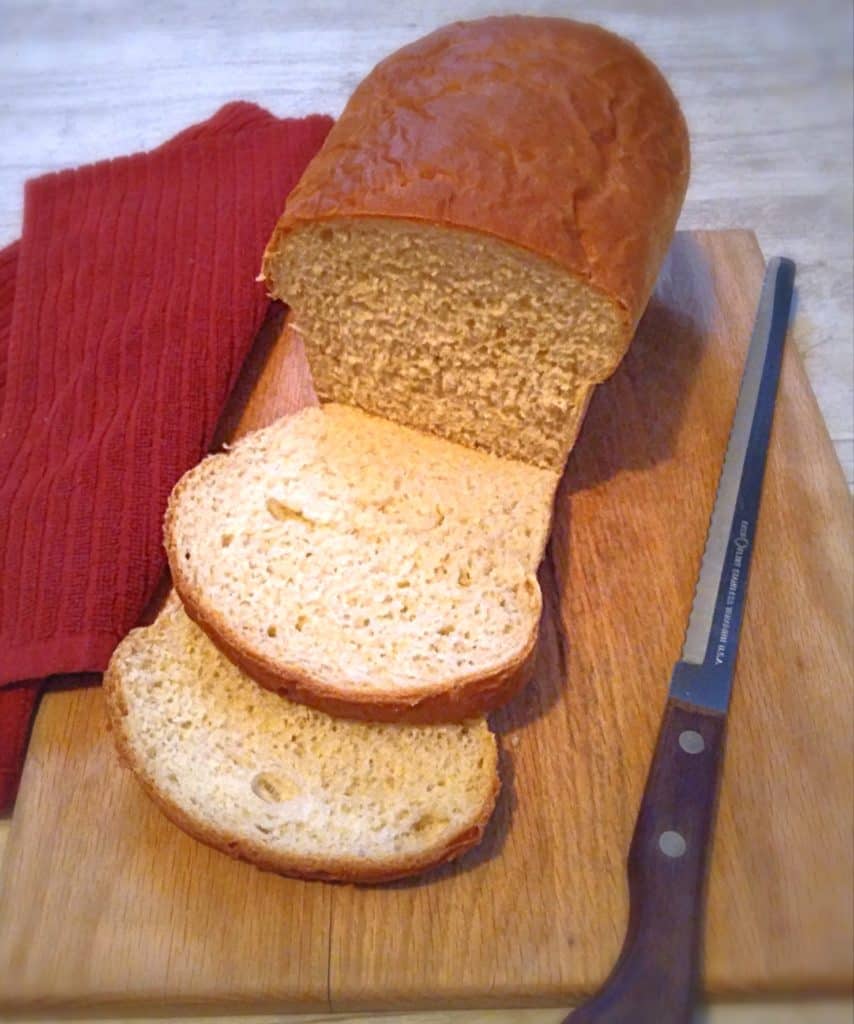
Transfer the loaves onto a cooling rack or a dish towel, and carefully slice a piece or two for a delicious treat. (Or in my case, slice the whole loaf. Because if my family of six is at home, the whole loaf disappears very quickly.)
I lay my bread on its side and carefully cut it in a sawing motion to avoid squashing the warm soft loaf. Slather it with butter and honey and be prepared for a taste of heaven.
Storing Homemade Bread
Some people will tell you to completely cool your bread before bagging it. However, I do not wait until it is completely cool. I bag my bread when it's still slightly warm because it helps to keep more moisture in, and the bread won't dry out as quickly.
Place whatever you won't get eaten within three or four days into the freezer.
Homemade bread is amazing when it is fresh. But it does tend to dry out and get moldy sooner than commercial bread because it doesn't have all those preservatives.
Freezing it, however, helps to keep it fresh. Just remove it from the freezer an hour or so before you want to slice it.
It might take a while to eat two loaves of bread if you're living by yourself. You can slice the bread and wrap a few pieces in separate portions. Make sure though, that you wrap it tightly in freezer bags or containers.
I find that it does freeze better as a whole loaf versus sliced. But if properly stored it will still be fine.
Refrigerating your bread is another option to lengthen the shelf life.
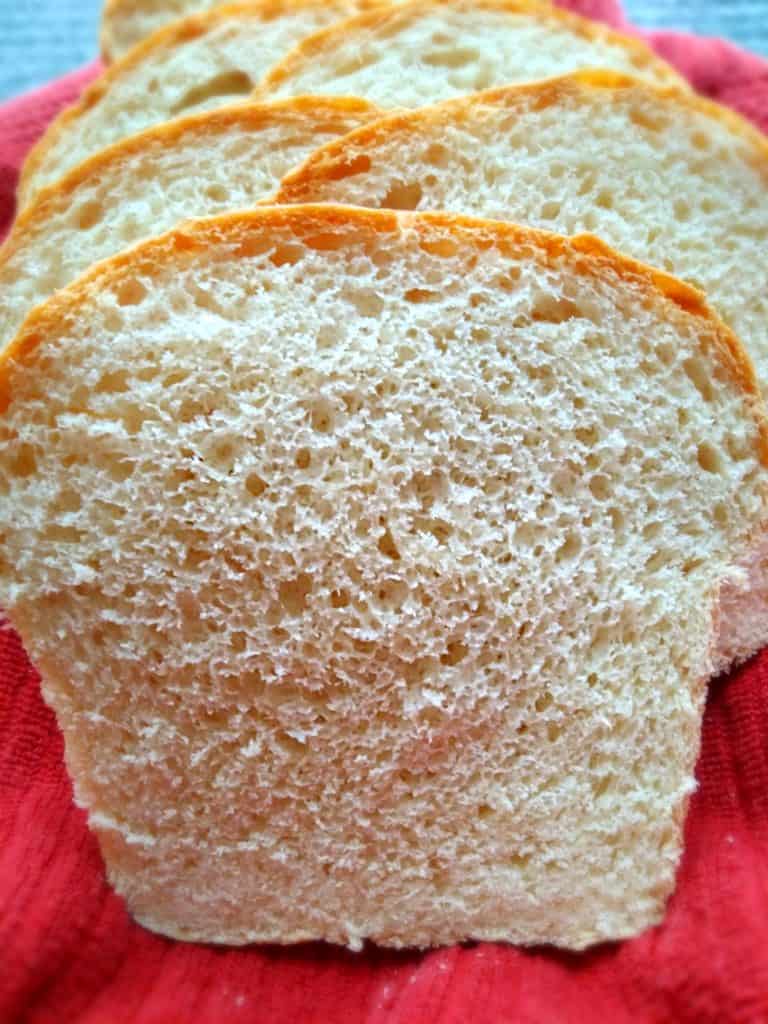
Homemade Amish White Bread
Amish homemade bread is good in so many different ways. Of course, it's the best when it's fresh out of the oven, but it also works great for sandwiches and makes the absolute best piece of toast!
You can even use this bread dough and turn it into cinnamon swirl bread. Roll out the dough and spread powdered sugar and cinnamon over it. So yummy!
More Delicious Homemade Bread Recipes
Easy Moist Amish Cornbread Recipe
AMAZON DISCLOSURE: I am a participant in the Amazon Services LLC Associates Program, an affiliate advertising program designed to provide a means for me to earn fees by linking to Amazon.com and affiliated sites. If you click on the link to make a purchase, I may earn a small commission at no extra cost to you. Thank you.
Items you may need...
Ultra Sharp Serrated Bread Knife for Homemade Bread
Visit my store to purchase my cookbook

Amish White Bread Recipe
Ingredients
- 1 1/2 Tbs. active dry yeast, mixed with 1 Tbs. flour and 1 Tbs. sugar
- 2 c. warm water (about 110°)
- 1/3 c. sugar
- 1/3 c. canola or vegetable oil (or chicken fat)
- 1/2 c. mashed potatoes (or 1/3 c. instant potato flakes mixed with approx. 1/3 c. water)
- 2 1/2 tsp. salt
- 5 - 6 c. white bread flour or all-purpose flour
Instructions
- Mix 1 Tbs. flour, 1 Tbs. sugar, and yeast in your KitchenAid mixing bowl.1 1/2 Tbs. active dry yeast, mixed with 1 Tbs. flour and 1 Tbs. sugar
- Add warm water. Stir, and let it rest for about 5 min.2 c. warm water (about 110°)
- Once the yeast mixture is looking creamy and bubbly, add the oil, sugar, potatoes, and salt. Stir.1/3 c. sugar, 1/3 c. canola or vegetable oil (or chicken fat), 1/2 c. mashed potatoes (or 1/3 c. instant potato flakes mixed with approx. 1/3 c. water), 2 1/2 tsp. salt
- Add 4 1/2 c. of flour and mix.5 - 6 c. white bread flour or all-purpose flour
- Continue kneading for a few minutes on speed 2, slowly adding more flour, as needed, until the dough pulls away from the sides of the bowl.
- When finished kneading, the sides of the bowl should be looking fairly clean. Drizzle a bit of oil into the side of the bowl and let the mixer spread the oil to grease the sides.
- Lightly cover the dough with a dish towel, and let it rest to rise for about an hour.
- Grease 2 (9x5") loaf pans with non-stick cooking spray.
- Punch the dough down. Butter your hands and knead the dough a bit. Divide the dough in half and shape it into two loaves. Poke the tops with a fork to remove air bubbles.
- Place the loaves into greased pans. Cover with a towel and allow them to rise for about 30 minutes, or until they have risen a bit above the sides of the pans.
- Preheat your oven to 350°. Bake for 32 - 36 minutes (depending on the thickness of your pan - thicker pans take longer).
- Brush the tops of the loaves with butter and allow the bread to cool for about 10 minutes before removing from the pans. Enjoy a delicious slice of warm fresh bread!
- Store in airtight bags. And you can freeze one loaf to keep it fresh.


Dan
Store bought bread has left me feeling bloated and gnarly so I have been on the search for a good recipe. Found it right here, I made this today and it is fantastic. Perfect balance of quick and the right tooth. Not to sweet or savory just a good all around recipe. Thanks for sharing I will be using this as my daily driver now.
Anna
Thank you for taking the time to leave a comment. Glad you enjoy it!
Glenys
I’ve used a lot of bread recipes, this is BY FAR the best. Excellent loaves every time! For white bread, I’ll never use another recipe! I’ve even taught my husband how to make this! Thank you so much!
Anna
I'm so glad you are enjoying it. Thank you for taking the time to leave a comment.
Lisa Hidlay
I have tried many different bread recipes over the past few years. Some were better for sandwiches, others better for toasting. This was excellent for both!
Tender, delicious and not difficult to make. This recipe is a keeper. Some September Farm cheese ( from Honey Brook Pa.) between 2slices of this bread would be awesome!
Anna
I'm so glad you enjoyed it! Love September Farms.
Matty Whittaker
For a first timer making bread I can't believe it turned out so well and without a mixer. Thank you so much for the simple directions, my family loved this recipe and we'll definitely use it again. I'm wondering if you can make rolls from this as well. Thanks!
Anna
I'm so glad that it turned out for you. And yes, you could make rolls from the same dough.
Linda
Amish Bread Recipe:
This homemade bread tastes far better than anything
you've ever bought in the bread aisle at your grocery store;
and it's really not that difficult to make. It will take some
time to let it rise - figure at least two hours from start to
finish. But most of that time you are free to do other things
around the house, as the yeast goes to work.
No ratings yet
I made this bread today yummy, and thank you.
I posted this on Facebook and had someone ask me what makes it Amish? I did not know what to say.
Can you answer that?
Anna
I call my recipes Amish because they are recipes that come from the Amish. This is a recipe that I grew up with, it came from my Amish home.
I'm glad you tried it.